Tent Setup and Layout Instructions
Begin by attaching hip rafters to the crown fitting and securing the fabric. Install side tees and corner fittings, ensuring stability. Tighten ropes and stakes properly for a secure setup.
1.1. Step-by-Step Assembly Process
Begin by laying out the tent frame on a flat surface, ensuring all parts are organized. Attach the hip rafters to the 3-way crown fitting, then add the top spreaders and rafters. Next, secure the side tees and corner fittings to the frame, ensuring alignment. Attach the tent fabric to the frame, starting from the roof and working downward. Tighten all ropes and straps evenly to maintain structural integrity. Finally, stake the tent to the ground using the provided ropes and stakes, ensuring stability and proper tension. Regularly check and tighten connections to ensure a secure setup, especially for larger sizes like the 10×30 tent.
1.2. Attaching Hip Rafters and Crown Fittings
Start by connecting the hip rafters to the 3-way crown fitting, ensuring a secure attachment. Align the rafters with the fitting’s pre-drilled holes and tighten using the provided bolts. Once the hip rafters are in place, attach the top spreaders to the crown fitting, ensuring they are evenly spaced for stability. Next, connect the side rafters to the hip rafters, forming the tent’s roof structure. Use the included hardware to tighten all connections firmly. Double-check that all fittings are properly aligned and secured to avoid any structural issues. This step is crucial for maintaining the tent’s integrity, especially for larger models like the 10×30 tent.
1.3. Securing the Tent Fabric and Roof
Once the frame is assembled, carefully drape the tent fabric over the roof structure, ensuring it aligns with the frame. Attach the fabric to the frame using loop straps, starting at the bottom and working your way up. Secure the fabric tightly around each leg fitting to prevent sagging. Next, attach the roof ropes to the center mast and tighten them evenly to ensure the fabric is taut. Use the provided hardware to fasten the fabric to the crown fitting, ensuring a snug fit. Finally, install any additional roof supports, such as spreaders, to maintain the tent’s shape. Double-check all connections to ensure the fabric and roof are securely in place for stability and safety.
1.4. Installing Side Tees and Corner Fittings
After assembling the main frame, install the side tees by attaching them to the legs and hip rafters. Ensure each side tee is securely fastened using the provided bolts and washers. Next, locate the corner fittings and slide them onto the legs, aligning them with the side tees. Tighten the bolts firmly to create a stable connection. Repeat this process for all four corners, ensuring each fitting is evenly tightened for proper alignment. Finally, double-check the connections to confirm the side tees and corner fittings are securely in place, providing structural integrity to the tent’s frame. This step is crucial for maintaining the tent’s stability and preventing potential damage during use.
1.5. Door and Window Installation
Begin by aligning the window panels with the designated openings on the tent fabric. Secure the windows using the provided Velcro straps or hooks, ensuring a tight fit. For the doors, attach the door frame to the tent’s entrance using the pre-attached hooks or straps. Tighten the door connections firmly to maintain structural integrity. Use rubber mallets to tap fittings into place if necessary. Ensure all zippers and fasteners are properly aligned and functioning smoothly. Double-check that windows and doors are securely attached to withstand wind and weather conditions. Proper installation ensures easy access and maintains the tent’s weather resistance and overall stability during use.

Safety Precautions and Warnings
Ensure the tent is securely anchored to prevent collapse. Use recommended hardware and follow weather guidelines. Regular inspections are crucial for safety and durability.
2.1. General Safety Guidelines
Always follow the manufacturer’s instructions carefully to avoid accidents. Ensure the tent is assembled on level ground, away from overhead obstructions. Use the recommended tools and hardware to secure all parts. Never assemble the tent in windy or stormy conditions, as this can lead to instability. Regularly inspect the tent for damage or wear. Keep flammable materials away from the tent. Ensure all fittings are tightly secured before use. Assign at least two people to assist with setup due to the size of the 10×30 tent. Never leave the tent unattended during assembly. Follow all local safety regulations and guidelines.
2.2. Weather Conditions and Stability
Always check the weather forecast before setting up your 10×30 tent. Avoid assembly during strong winds, thunderstorms, or heavy rain, as these can damage the structure. Ensure the tent is securely anchored to the ground using sturdy ropes and stakes. Choose a level, dry location to maintain stability. If rain is expected, ensure proper drainage to prevent water pooling on the roof. In windy conditions, tightly secure all fabric and hardware. For added stability, weigh down the tent with sandbags or additional anchors if necessary. Never leave the tent unattended in harsh weather. Regularly inspect the tent’s stability during prolonged use. Follow the manufacturer’s guidelines for maximum wind speed tolerance to ensure safety and longevity.
Maintenance and Care
Regularly clean the tent fabric with mild detergent and water. Allow it to dry completely before storage. Inspect for damage and repair promptly to ensure longevity.
3.1. Cleaning and Storage Tips
Regular cleaning is essential to maintain your 10×30 tent’s durability. Use a mild detergent and water to wipe down the fabric, avoiding harsh chemicals that may damage the material. Allow the tent to air dry completely before storing to prevent mold and mildew. Store the tent in a cool, dry place, away from direct sunlight. Ensure all parts, including poles and fittings, are securely packed in labeled bags. Proper storage will extend the lifespan of your tent and ensure it remains in excellent condition for future use.

3.2. Regular Inspection and Repair
Regularly inspect your 10×30 tent for signs of wear and tear to ensure its structural integrity. Check the fabric for tears, mildew, or UV damage, and repair any holes immediately using a waterproof patch kit. Inspect all hardware, such as connectors and fittings, for rust or damage, and replace worn parts promptly. Tighten any loose bolts or screws to maintain stability. After each use, clean and dry the tent thoroughly before storage to prevent mold growth. Addressing minor issues early can prevent major repairs and extend the tent’s lifespan, ensuring it remains safe and functional for years to come.
Parts List and Identification
Your 10×30 tent includes essential components like poles, hip rafters, crown fittings, side tees, corner fittings, fabric, and stakes. Familiarize yourself with each part before assembly.
4.1. Essential Components and Hardware
Your 10×30 tent package includes a durable fabric roof, sturdy aluminum poles, hip rafters, crown fittings, side tees, and corner fittings. Additional hardware such as loop straps, ropes, and stakes is provided for secure setup. The tent also comes with a detailed parts list and installation guide to ensure all components are accounted for and properly utilized during assembly. Familiarizing yourself with these essential items will streamline the setup process and ensure a stable structure. Always verify the completeness of your kit before beginning installation to avoid delays.
4.2. Tools Required for Assembly
To efficiently assemble your 10×30 tent, gather essential tools: a rubber mallet for securing parts without damage, a ladder for reaching high areas, and a wrench for tightening bolts. Screwdrivers may be needed for specific fittings. Rope tighteners will help secure the fabric tightly. A measuring tape ensures accurate alignment, and safety gloves protect your hands. A ground tarp is recommended to shield the tent base. Always refer to the instruction manual for guidance. Having these tools ready will streamline the process and prevent delays. Ensure all items are available before starting to avoid interruptions during setup.

Common Assembly Issues and Solutions
Common issues include misaligned parts and loose connections. Solutions involve checking alignment, tightening fittings, and ensuring fabric is taut with proper stake placement.
5.1. Troubleshooting Frame and Fabric Problems
Frame issues often arise from misaligned rafters or loose connections. Ensure all fittings are securely tightened and rafters are evenly spread. For fabric problems, check for tears or sagging areas. Tighten fabric ropes and adjust stakes to maintain tautness. If fabric is torn, use repair patches or tape immediately to prevent further damage. Ensure the roof is centered and evenly spaced to avoid uneven stress. Regularly inspect all components for wear and tear. Addressing these issues promptly ensures stability and longevity of the tent structure.
5.2. Addressing Hardware and Fitting Challenges
Hardware and fitting issues are common during tent assembly. Loose connections can cause instability, so ensure all bolts and screws are tightened properly. If a fitting is damaged, replace it immediately to avoid structural weakness. Lubricate moving parts to prevent rust and friction. Missing hardware should be replaced with exact replicas to maintain compatibility. Check for stripped threads and tighten any wobbly joints. Use a wrench or socket set for secure tightening. Regularly inspect all hardware for signs of wear or corrosion. Addressing these challenges ensures a sturdy and reliable tent structure. Keep spare hardware on hand for quick repairs during setup.

Additional Tips for Setup and Use
Choose a flat, dry area for setup, avoiding obstacles. Secure the tent tightly and organize interior space efficiently for maximum comfort and functionality during events or gatherings.
6.1. Choosing the Best Location
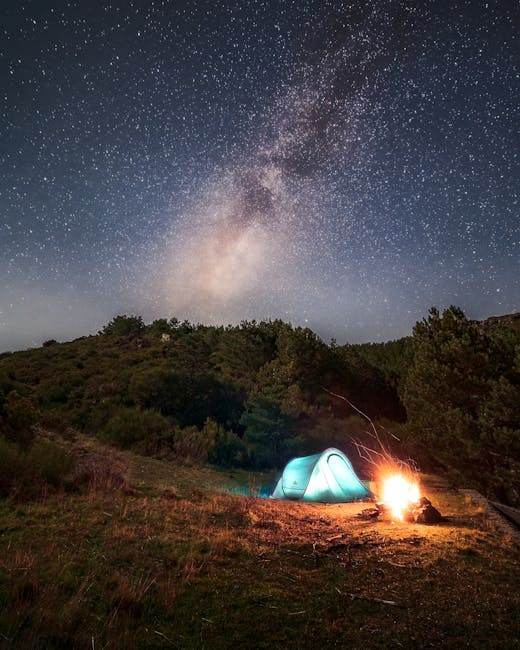
Selecting the right location for your 10×30 tent is crucial for a successful setup. Ensure the area is flat, dry, and free from obstacles like rocks or uneven ground. Proper drainage is essential to avoid water pooling during rain. Avoid setting up under trees or power lines to prevent damage or safety hazards. Check for underground utilities and avoid areas with soft or unstable soil. Consider sunlight direction to minimize heat exposure and wind patterns for stability. Measure the space to confirm it can accommodate the tent fully expanded. Finally, clear debris and level the ground before starting assembly for a secure and even setup.
6.2. Organizing Space Inside the Tent

Organizing the interior of your 10×30 tent is essential for functionality and comfort. Start by planning the layout based on your event needs, ensuring ample space for seating, tables, or equipment. Use vertical space by installing shelves or hooks for storage. Keep the center clear to maintain easy movement and accessibility. Strategically place furniture and equipment to avoid overcrowding. Ensure good ventilation by keeping windows and doors open when possible. Use dividers or curtains to create separate areas if needed. Secure any loose items to prevent damage or tripping hazards. Proper organization enhances safety and ensures a comfortable environment for everyone inside the tent.