Orbit Water Timer Instruction Manual: A Comprehensive Guide
Welcome! This manual provides detailed guidance for Orbit watering timers, encompassing models from simple digital timers to advanced B-hyve smart systems.
Understanding your timer’s features ensures efficient lawn and garden hydration, conserving water and promoting healthy plant growth.
Explore setup, programming, troubleshooting, and maintenance for optimal performance, maximizing your investment in Orbit irrigation technology.
Understanding Your Orbit Water Timer
Orbit water timers are designed to automate your irrigation, saving you time, water, and money. These devices range from basic mechanical timers to sophisticated, app-controlled smart systems like the B-hyve series.
Understanding the core components is crucial: the timer body connects directly to your faucet, controlling water flow to hoses or drip irrigation.
Digital timers feature programmable schedules, while smart timers offer remote control via Wi-Fi and smartphone apps.
Key elements include the display panel for setting programs, buttons for manual operation, and a battery compartment for power.
Different models, such as the 62067 and 62056, cater to varying needs, from single-outlet simplicity to multi-zone control. Familiarizing yourself with your specific model’s layout is the first step to successful operation.
Timer Models: Identifying Your Specific Unit
Orbit offers a diverse range of water timers, each designed for specific irrigation needs. The Orbit 62067 is a popular 1-outlet programmable digital hose timer, ideal for basic lawn and garden watering.
For simpler setups, the 62056 provides a single-dial, easy-to-use solution. Stepping up in functionality, the B-hyve XD 24634 is a Bluetooth 4-outlet hose faucet timer, offering greater control and zone management.
Identifying your model is crucial for accessing the correct instruction manual and support resources. Locate the model number printed on the timer’s body, typically on the back or bottom.
This number unlocks access to specific programming instructions, troubleshooting guides, and replacement parts information on the Orbit website.
Key Features and Benefits of Orbit Timers
Orbit timers deliver numerous benefits, starting with water conservation – preventing overwatering and reducing your water bill. Programmable schedules allow customized watering durations and frequencies, tailored to your plants’ needs.
Smart B-hyve models offer remote control via a mobile app, providing convenience and flexibility. Features like rain delay automatically pause watering during precipitation, further optimizing water usage.
Orbit timers accommodate drip irrigation and hose-based systems, catering to diverse gardening setups. Durable construction ensures long-lasting performance, while easy-to-understand interfaces simplify programming.
Ultimately, Orbit timers promote a healthier, greener landscape with minimal effort and maximum efficiency.

Setting Up Your Orbit Water Timer
Begin by securely connecting the timer to your faucet, ensuring a leak-proof seal. Next, install batteries and power on the device to initiate the setup process.
Initial Setup: Connecting to the Faucet
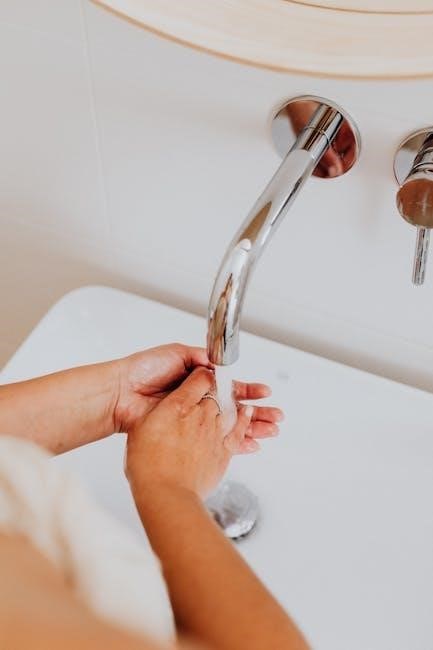
Proper faucet connection is crucial for reliable operation. Begin by ensuring the faucet is fully turned off. Hand-tighten the timer onto the faucet spigot, avoiding the use of tools which could overtighten and damage the connection.
Check for any existing washers or rubber gaskets; if present, ensure they are correctly seated to prevent leaks; For optimal sealing, consider using Teflon tape around the faucet threads before attaching the timer. Once connected, slowly turn on the faucet, observing for any drips or leaks around the connection point.
If leaks occur, tighten the timer slightly or re-apply Teflon tape. Important: Do not force the connection. A secure, hand-tight fit is sufficient. Finally, attach your garden hose or drip irrigation system to the timer’s outlet, again ensuring a snug, leak-free connection.
Installing Batteries and Powering On
Powering your Orbit timer typically requires AA or AAA batteries, depending on the model. Locate the battery compartment, usually on the side or back of the unit, and open it according to the manufacturer’s instructions. Insert the batteries, ensuring correct polarity (+ and -) as indicated inside the compartment.
Most timers feature a power button or automatically activate upon battery installation. Press the power button if present, and observe the display screen for signs of life. If the screen remains blank, double-check the battery polarity and ensure the batteries are fresh.
Some smart timers may require initial charging via a USB connection before battery operation. Refer to your specific model’s documentation for detailed instructions. A fully powered timer is essential for accurate programming and reliable operation.
Programming the Timer: Basic Settings

Initial programming involves setting the current time and date on your Orbit timer. Access the programming mode by pressing the “Set” or “Program” button – consult your model’s specific instructions. Use the up and down arrows, or dial, to adjust the hour, minute, and year, confirming each selection.
Next, establish your desired start time for watering. This is the time the timer will initiate the watering cycle. Following this, set the watering duration, specifying how long each watering session will last, typically in minutes.
Finally, select the watering frequency – how often you want the timer to operate (e.g., daily, every other day, specific days of the week). Save your settings to activate the basic program.

Advanced Programming Options
Unlock precision! Explore multiple programs for customized schedules, rain delay to pause watering, and seasonal adjustments for optimal water usage and plant health.
Setting Watering Duration and Frequency
Precise control is key! To set watering duration, navigate to the program settings on your Orbit timer. Use the control dial or app interface to specify the watering time, typically measured in minutes, for each zone or program. Consider plant type and soil conditions when determining duration – shorter times for delicate plants, longer for established lawns.
Frequency dictates how often the timer activates. Options range from daily to specific intervals (e.g., every other day, weekly). Adjust frequency based on weather patterns and seasonal needs. During hotter periods, increase frequency; during cooler, wetter times, reduce it. The B-hyve app offers intelligent scheduling based on local forecasts, optimizing water use automatically. Remember to save your settings after each adjustment!
Multiple Programs: Creating Customized Schedules
Tailor watering to your garden’s diverse needs! Many Orbit timers allow multiple independent programs. This is ideal for lawns, flowerbeds, and vegetable gardens, each with unique watering requirements. Access the program settings and create a new program, assigning it a descriptive name (e.g., “Lawn,” “Flowers”).
Within each program, set the start time, duration, and frequency as described previously. You can even stagger start times to avoid overwhelming your water supply. The B-hyve app simplifies this process with a user-friendly interface. Utilize this feature to create a customized watering schedule that promotes healthy growth throughout your landscape, maximizing efficiency and minimizing waste.
Rain Delay Function: Pausing Watering During Precipitation
Conserve water and prevent overwatering with the rain delay feature! When rainfall is anticipated or occurs, activate the rain delay to temporarily suspend your programmed watering schedule. This prevents unnecessary water usage and protects plants from root rot. Access the rain delay setting through the timer’s interface or the B-hyve app;
Specify the duration of the delay – typically ranging from hours to days – based on the forecast. The timer will automatically resume the programmed schedule once the delay period expires. This intelligent feature ensures efficient water management, adapting to real-time weather conditions and promoting a sustainable gardening practice.

Using the B-hyve App (Smart Timers)
Unlock remote control! The B-hyve app enables smartphone management of compatible Orbit timers, offering convenient scheduling, monitoring, and adjustments from anywhere with Wi-Fi access.
Downloading and Installing the B-hyve App
Getting Started with B-hyve: To begin utilizing the smart features of your Orbit B-hyve timer, the first step is downloading and installing the B-hyve mobile application. The app is readily available for both iOS and Android devices.
For iOS users: Open the Apple App Store and search for “B-hyve”. Locate the app developed by Orbit and tap “Get” to initiate the download and installation process. You may be prompted to enter your Apple ID password or use Face/Touch ID for verification.
For Android users: Open the Google Play Store and search for “B-hyve”. Find the app by Orbit and tap “Install”. Accept the necessary permissions requested by the app to proceed with the installation.
Once the installation is complete, tap “Open” to launch the B-hyve app and begin the account creation or login process. Ensure your smartphone has a stable internet connection throughout the download and installation.
Connecting Your Timer to Wi-Fi
Establishing a Wireless Connection: To unlock the full potential of your B-hyve smart timer, connecting it to your home Wi-Fi network is crucial. Begin by ensuring your timer is within range of your Wi-Fi router. Open the B-hyve app and navigate to the “Add Device” section.
The app will guide you through the connection process, prompting you to select your Wi-Fi network from a list of available networks. Enter your Wi-Fi password accurately when requested. The timer will attempt to connect to the network; this may take a few moments.
A successful connection is indicated by a confirmation message within the app. If the connection fails, double-check your password and ensure your router is functioning correctly. A stable Wi-Fi signal is essential for reliable remote control and monitoring.
Remote Control and Monitoring via the App
B-hyve App Capabilities: Once connected to Wi-Fi, the B-hyve app grants you complete control over your Orbit timer from anywhere with an internet connection. You can start, stop, or modify watering schedules remotely, eliminating the need to be physically present at the faucet.
The app provides real-time monitoring of watering status, allowing you to track water usage and ensure your plants receive the appropriate hydration. Receive instant notifications regarding schedule changes, low battery alerts, or potential issues.
Customize watering preferences, adjust durations, and create multiple programs tailored to different zones or plant types. The B-hyve app empowers you to manage your irrigation system efficiently and effectively, conserving water and promoting a thriving landscape.

Troubleshooting Common Issues
Facing problems? This section offers solutions for typical issues like timers failing to activate, watering not commencing, or app connectivity disruptions.
Diagnose and resolve quickly!
Timer Not Turning On: Battery and Connection Checks
Is your Orbit timer unresponsive? Begin with the basics: verify battery installation. Ensure batteries are fresh and correctly positioned within the compartment, observing proper polarity (+/-). Low battery power is a frequent cause of operational failure. Next, inspect the timer’s connection to the faucet. Confirm a secure, leak-proof attachment – a loose connection can interrupt power flow and prevent activation.
If the issue persists, examine the faucet itself. Is water flowing freely? A blocked faucet will obviously prevent the timer from functioning. Also, check for any internal corrosion within the battery compartment. Clean contacts with a dry cloth if necessary. For smart timers, ensure the unit is adequately charged if it features a rechargeable battery. Finally, consult the specific model’s diagram within this manual for detailed component locations.
Watering Not Starting: Program Verification
Is your Orbit timer powered on but not initiating watering cycles? The most common culprit is an incorrect or incomplete program. Carefully review all programmed settings: start time, duration, and frequency. Ensure the current date and time are accurately set within the timer’s interface. Double-check that the selected program is enabled and hasn’t been accidentally deactivated.
For multi-program timers, verify you’re reviewing the active program. Consider a manual start test to bypass programmed settings and confirm the timer’s valve operation; If manual start works, the issue definitively lies within the programming. Also, confirm there are no rain delay or seasonal pause functions active that might be overriding the schedule. Refer to the programming section of this manual for step-by-step guidance.
App Connectivity Problems: Troubleshooting Wi-Fi
Experiencing difficulty connecting your B-hyve timer to the app? Begin by verifying your home Wi-Fi network is functioning correctly with other devices. Ensure the timer is within range of your Wi-Fi router; signal strength diminishes with distance and obstructions. Restart both your router and the Orbit timer – a simple reboot often resolves connectivity issues.
Confirm you’re using the correct Wi-Fi password within the B-hyve app. Temporarily disable any firewall settings on your router that might be blocking the timer’s connection. Check for app updates, as outdated versions can cause compatibility problems. If issues persist, try resetting the timer’s Wi-Fi module (refer to the timer’s specific model instructions) and re-pairing it with the app.

Maintenance and Care
Regular upkeep extends your timer’s life! Clean the unit, inspect connections, and winterize to prevent damage. Battery replacement ensures consistent, reliable operation throughout the season.
Cleaning the Timer and Faucet Connection
Maintaining a clean timer and faucet connection is crucial for optimal performance and longevity. Over time, mineral deposits and debris can accumulate, potentially clogging the water flow and affecting the timer’s accuracy. To clean the timer, gently wipe the exterior with a damp cloth, avoiding harsh chemicals or abrasive cleaners.
For the faucet connection, disconnect the timer and inspect the threads for buildup. Use a soft brush and mild soap to remove any debris. Rinse thoroughly with water. Inspect the rubber washers or seals within the connection for wear and tear; replace them if necessary to ensure a watertight seal. A clean connection prevents leaks and ensures consistent water delivery to your lawn and garden. Regular cleaning, ideally at the beginning and end of the watering season, will help keep your Orbit timer functioning smoothly.
Winterizing Your Timer: Preventing Freeze Damage
Protecting your Orbit timer from freezing temperatures is essential to prevent damage and ensure its functionality next season. Before the first frost, disconnect the timer from the faucet and completely drain all water from within the unit. Remove the batteries to prevent corrosion caused by extreme cold.
Store the timer indoors in a dry, frost-free location. Do not leave it exposed to the elements. If your timer has a manual override function, ensure it’s switched to the “off” position. Consider storing any attached hoses indoors as well. Proper winterization safeguards your investment and guarantees a hassle-free start to your watering schedule when spring arrives. Following these steps will extend the life of your Orbit timer significantly.
Replacing Batteries: Maintaining Optimal Performance
Consistent battery power is crucial for reliable timer operation. Orbit timers typically use AA or AAA alkaline batteries, depending on the model. Replace batteries annually, or sooner if the display appears dim or the timer malfunctions. Always use fresh batteries from a reputable brand for optimal performance.
Before installing new batteries, ensure the timer is turned off. Carefully remove the old batteries, observing the correct polarity (+ and -). Insert the new batteries, again ensuring correct polarity. A low battery indicator will often alert you when replacement is needed. Regular battery changes prevent unexpected interruptions to your watering schedule and maintain the accuracy of your programmed settings, maximizing the benefits of your Orbit timer.

Specific Orbit Timer Models
Orbit offers diverse timers like the 62067, 62056, and B-Hyve XD 24634. Each model possesses unique features tailored for varied watering needs and garden sizes.
Orbit 62067 1-Outlet Programmable Digital Hose Watering Timer
The Orbit 62067 is a popular, user-friendly choice for basic automated watering. This 1-outlet timer allows for programmable schedules, eliminating the need for manual on/off operation. It features a digital display for easy setting of watering duration (from 1 to 99 minutes) and frequency (up to twice daily).
Installation is straightforward – simply attach it to your faucet and hose. Battery operation (typically two AAA batteries, not included) provides power. The timer is ideal for small gardens, lawns, or potted plants. Its programmable settings help conserve water and maintain a healthy landscape. Remember to check battery levels regularly for consistent performance. This model is a cost-effective solution for simple irrigation needs.
Orbit 62056 One Outlet Single-Dial Hose Faucet Timer
The Orbit 62056 offers a simplified watering solution with its intuitive single-dial operation. This timer is perfect for users seeking a straightforward, no-fuss approach to automated irrigation. It allows you to set watering duration, from 1 to 60 minutes, and frequency, with options for every 1 to 7 days.
Installation is quick and easy, attaching directly to your outdoor faucet and hose. Like the 62067, it’s battery-powered (typically two AAA batteries, sold separately). This model is well-suited for smaller gardens, flowerbeds, or vegetable patches. Its durable construction ensures reliable performance. The single-dial design makes adjustments simple, even for those unfamiliar with programmable timers. It’s a budget-friendly option for basic watering automation.
Orbit B-Hyve XD 24634 Bluetooth 4-Outlet Hose Faucet Timer
The Orbit B-hyve XD 24634 elevates hose-based watering with smart technology and expanded control. Featuring four independently programmable outlets, this timer allows for customized watering schedules for different zones or plant types. Bluetooth connectivity enables control via the B-hyve app, offering remote operation and monitoring.

Users can set watering durations, frequencies, and even adjust schedules based on real-time weather data. The app provides insights into water usage and helps optimize irrigation for water conservation. Installation is straightforward, connecting to a standard faucet. This model is ideal for larger gardens or landscapes with diverse watering needs. It’s a smart investment for those seeking convenience and efficiency.